 Pin
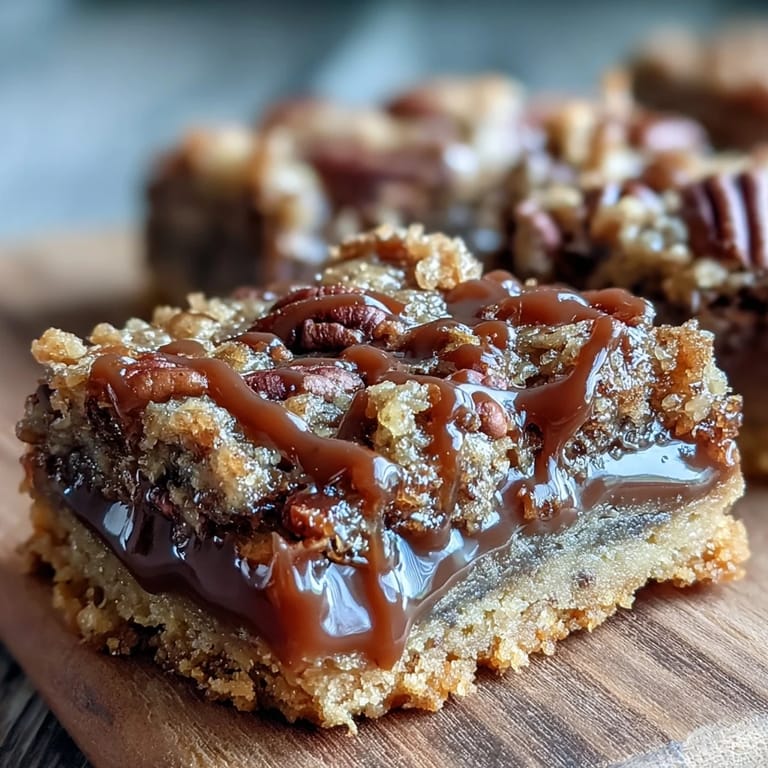
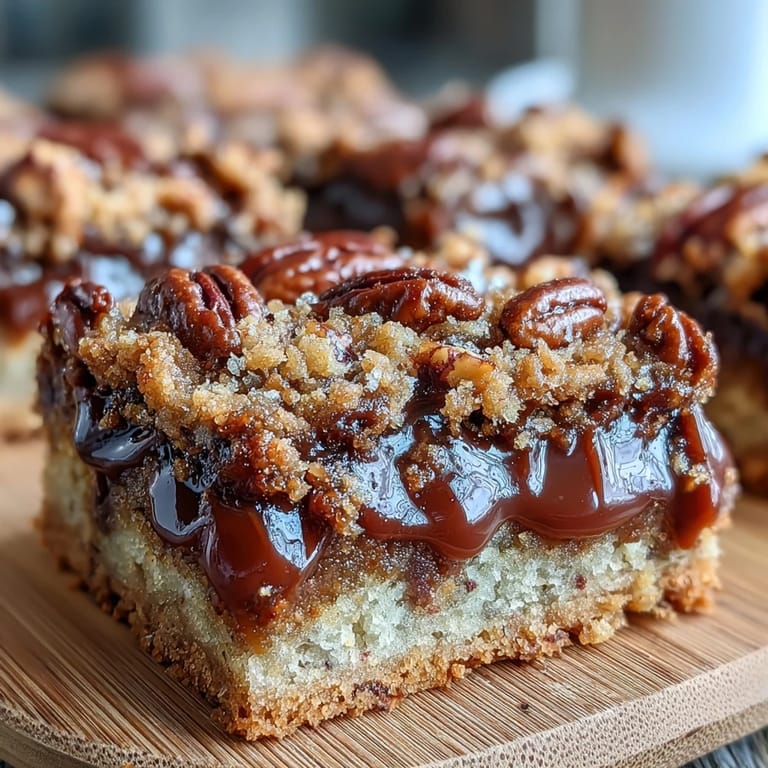
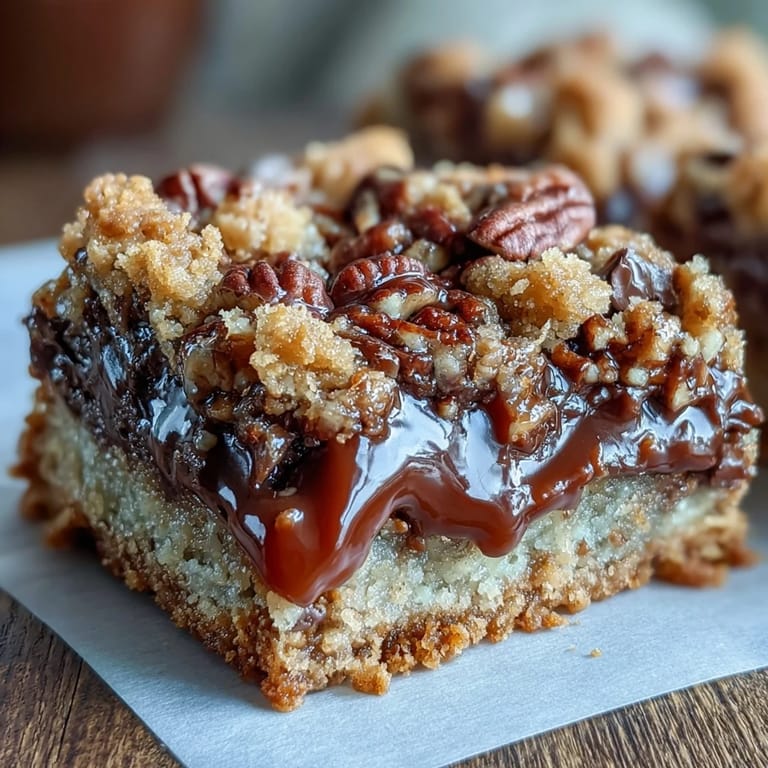
Pin My grandmother never measured anything when she made turtle candies, just handfuls of pecans and caramel that somehow worked perfectly every time. These bars capture that same magic but in a form that feeds a crowd without endless hours of dipping individual chocolates. The first time I brought them to a potluck, they disappeared before anyone even touched the homemade cookies nearby.
Last autumn, my neighbor smelled these baking through our open kitchen window and showed up with vanilla ice cream before I had even finished cutting them. We ate them warm with melting ice cream while sitting on her back porch, watching leaves fall and agreeing that sometimes caramel solves everything.
Ingredients
- 1 cup all purpose flour: Forms the structure that holds all those gooey layers together
- 1 cup rolled oats: Use old fashioned oats rather than instant for better texture and chew
- 1/2 cup packed brown sugar: Adds moisture and deeper flavor that white sugar alone cannot provide
- 1/2 cup granulated sugar: Balances the brown sugar and helps the crust crisp up properly
- 1/2 cup unsalted butter melted: Use real butter rather than margarine for the best flavor
- 1/4 teaspoon salt: Enhances all the other flavors especially the chocolate
- 1/2 teaspoon baking soda: Helps the crumb topping puff slightly for lighter texture
- 1 cup semi sweet chocolate chips: Milk chocolate makes these too sweet while dark chocolate overwhelms the caramel
- 1 cup chopped pecans: Toast them lightly beforehand if you want even more nutty flavor
- 1 cup caramel sauce: Homemade is wonderful but good quality store bought works perfectly
- 1/4 cup heavy cream: Thins the caramel just enough so it pours smoothly over the chocolate layer
Tired of Takeout? 🥡
Get 10 meals you can make faster than delivery arrives. Seriously.
One email. No spam. Unsubscribe anytime.
Instructions
- Prep your pan and heat the oven:
- Preheat to 350 degrees and line a 9x9 pan with parchment paper letting the edges overhang for easier lifting later
- Mix the crumb base:
- Combine flour oats both sugars melted butter salt and baking soda until everything looks like coarse crumbs with some pea sized pieces remaining
- Reserve topping and press crust:
- Set aside one cup of the mixture then press the rest firmly and evenly into your prepared pan using the bottom of a measuring cup
- Par bake the crust:
- Bake for just 10 minutes until the surface looks dry and slightly golden which prevents a soggy bottom later
- Warm the caramel mixture:
- Stir caramel sauce and cream together over medium low heat until completely smooth then remove from heat immediately
- Layer the chocolate and nuts:
- Sprinkle chocolate chips evenly over the warm crust then scatter chopped pecans on top
- Drizzle the caramel:
- Pour the warm caramel mixture slowly back and forth over the entire surface trying to cover most of the chocolate and nuts
- Add the crumble topping:
- Sprinkle your reserved crumb mixture over the caramel layer leaving some caramel peeking through for that pretty swirled look
- Bake until golden:
- Return to the oven for 15 to 20 minutes until the topping is golden brown and the caramel is bubbling around the edges
- Cool completely before cutting:
- Let the bars cool fully in the pan then use the parchment edges to lift them out before slicing into neat squares
 Pin
Pin These became my go to contribution for every family gathering after my aunt asked for the recipe at three different holidays. Now I double the batch because the first pan always vanishes before people even make it to the dessert table.
Making Ahead
These bars actually taste better the next day after all the flavors have time to mingle and settle. I bake them the evening before serving and store them at room temperature tightly covered with plastic wrap.
Storage Secrets
Keep layers separated with wax paper if you stack them in a container to prevent sticking. They stay fresh for a week at room temperature or freeze beautifully for up to three months wrapped well.
Serving Ideas
Try warming individual squares for about 15 seconds in the microwave before serving with vanilla ice cream. The caramel gets soft and gooey again while the chocolate turns into fudge sauce right in your bowl.
- A pinch of flaky sea salt on top makes all the flavors pop
- Whipped cream balances the richness perfectly
- Coffee cuts through the sweetness beautifully
 Pin
Pin These turtle bars have become the dessert I bake when I need something that feels special but does not require hours of fussing in the kitchen.
Recipe Q&A
- → How long do these bars last?
When stored in an airtight container at room temperature, these delightful bars will maintain their freshness and chewiness for up to one week. For longer preservation, they can be refrigerated.
- → Can I use a different type of nut?
Absolutely! While pecans are traditional for turtle bars, you can easily substitute them with chopped walnuts or almonds for a different flavor profile. Ensure they are toasted for best results.
- → What if my caramel is too thick?
If your caramel sauce is too thick to pour smoothly, gently warm it over low heat with an additional tablespoon or two of heavy cream until it reaches a pourable consistency. Stir constantly to prevent scorching.
- → How do I know when the bars are done baking?
The bars are ready when the crumb topping is golden brown and appears set. The filling underneath will still be soft when warm but will firm up as it cools. Avoid overbaking to maintain chewiness.
- → Can I make these ahead of time?
Yes, these squares are excellent for making ahead! They need to cool completely before cutting, which can take a few hours. Preparing them the day before serving allows ample cooling time and deepens the flavors.
- → Are there any tips for cleaner cuts?
For the cleanest cuts, ensure the bars are completely chilled, preferably refrigerated for at least an hour. Use a sharp, warm knife (run under hot water and wipe dry) and clean the blade between each slice.