Pin
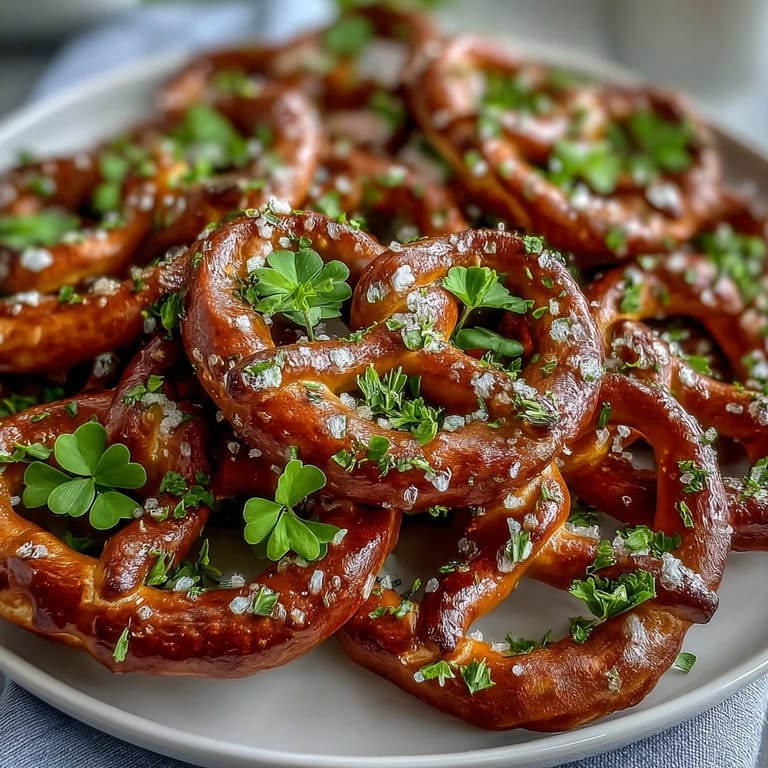
Pin My neighbor knocked on the door last March with a plate of these emerald-green shamrock pretzel bites, and I was immediately charmed—not just by how festive they looked, but by how she'd arranged them in this little leprechaun-themed box. I asked for the recipe right then and there, and when I made them myself the next year, I realized how therapeutic it is to arrange those tiny pretzel twists into little clovers, one after another, like creating an edible garden. What started as a casual St. Patrick's Day snack became my go-to thing to bring to parties because people genuinely light up when they see them.
There was this one time I brought three dozen to my office on St. Patrick's Day, and by noon they were completely gone—not a crumb left. My coworker Sarah asked if I could make them for her daughter's school party, and suddenly I was assembling shamrocks at my kitchen counter while my own kids taste-tested the sprinkles. That's when I knew this recipe had staying power.
Ingredients
- 90 small pretzel twists (about 3 per shamrock): These are the foundation, and I learned to buy them in bulk because counting out exactly 90 takes longer than you'd think—just grab a bag and eyeball it.
- 30 mini pretzel sticks (for stems): Look for these near the regular pretzel section; they're thinner and perfect for creating that little stem detail that makes them unmistakably shamrock-shaped.
- 340 g (12 oz) green candy melts: The star ingredient that holds everything together; quality matters here because cheaper melts can be grainy or too thick, so stir in that optional coconut oil if yours seem sluggish.
- 1 tsp coconut oil or vegetable shortening (optional, for smoother coating): This small addition transforms stiff candy coating into something that flows like silk, making dipping so much easier.
- Green and white sprinkles or sanding sugar: Go with sanding sugar if you want that elegant look, but sprinkles are more forgiving and more festive—honestly, use whichever makes you happy.
Tired of Takeout? 🥡
Get 10 meals you can make faster than delivery arrives. Seriously.
One email. No spam. Unsubscribe anytime.
Instructions
- Set up your workspace:
- Line that baking sheet with parchment paper and find a spot where it won't get jostled around—you'll thank yourself later when lifting these off is effortless.
- Build your shamrocks:
- Take three pretzel twists and curve them so they're touching in the center, creating that clover leaf shape—it's oddly satisfying, almost meditative. Pop a mini pretzel stick below as the stem and repeat until you've got 30 shamrocks arranged on the sheet.
- Melt the magic:
- Heat your candy melts in the microwave according to the package (usually 30-second bursts, stirring between), and if the mixture looks thick or reluctant, that's your cue to add a touch of coconut oil. Stir until it's smooth and glossy.
- Coat with intention:
- Using a fork or spoon, drizzle or spoon that green coating over each shamrock, making sure every pretzel gets kissed with color and the twists stick together. Work gently so you don't disturb your arrangements.
- Sprinkle while it's wet:
- This is the window where everything sticks, so don't wait—shower those shamrocks with green and white sprinkles before the coating firms up even slightly.
- Let time do the work:
- Set them on the counter for 20 minutes if you're patient, or pop them in the fridge for 10 if you're not—either way, you'll know they're ready when the coating snaps cleanly when you try to lift one.
- Transfer to glory:
- Once they're set, gently peel them off the parchment (they should release easily if you got the coating thickness right) and arrange them on a platter.
 Pin
Pin What got me about these shamrock bites was watching my daughter carefully arrange her first batch, concentrating like she was solving a puzzle, then beaming when she realized she'd made something genuinely beautiful. Food has a way of doing that—turning a simple afternoon into a memory worth keeping.
Flavor Variations That Work
If plain green candy coating feels a little one-note to you, a tiny drop of peppermint extract transforms them into something that tastes like a fancy holiday candy. I've also had success with white chocolate tinted green (using a few drops of gel food coloring), which gives a creamier bite and feels slightly more sophisticated—though honestly, kids prefer the traditional sweet mint version. One year I experimented with swapping half the sprinkles for crushed candy canes, and that became my new tradition.
Storage and Make-Ahead Strategy
These hold up beautifully in an airtight container at room temperature for up to five days, so you can absolutely make them the night before a party without stress. I've learned that stacking them loosely with parchment between layers prevents the coating from getting sticky or the sprinkles from transferring. If you're feeling really organized, you can even assemble the pretzel shamrocks the day before and just do the coating and sprinkles the morning of—it breaks the work into manageable chunks.
Troubleshooting and Small Victories
The most common hiccup is coating that's too thick, which makes drizzling frustrating and drying takes forever—this is where that optional coconut oil truly earns its place. Another thing I discovered the hard way: if you wait too long to sprinkle after coating, they won't stick, so timing is everything. The good news is that even if a shamrock looks a little messy or off-balance, once it sets, nobody notices because they're too busy eating them.
- If your coating cracks when you try to lift the shamrock, it was still too warm—give it those full 20 minutes next time.
- A small offset spatula or thin butter knife makes lifting them off the parchment infinitely easier than using your fingers.
- Buy a few extra pretzel twists because at least three or four will inevitably disappear into the snacker's mouth while you're assembling.
 Pin
Pin These little shamrocks have become my quiet St. Patrick's Day tradition, the thing I look forward to making more than wearing green. They're proof that the best recipes aren't always complicated—sometimes they're just the ones that bring small joy.
Recipe Q&A
- → How do I shape the pretzel bites into shamrocks?
Arrange three small pretzel twists touching at their curves to form leaves, and attach one mini pretzel stick as the stem to create a shamrock shape.
- → What can I use if green candy melts aren't available?
Substitute white chocolate with green food coloring for a similar coating effect and festive color.
- → How should the candy coating be melted for best results?
Melt the candy melts in a microwave-safe bowl following package instructions, optionally stirring in coconut oil for a smoother texture.
- → Can I add flavors to the candy coating?
Yes, adding a drop of peppermint extract enhances the flavor while maintaining the sweet coating consistency.
- → What is the best way to store the finished pretzel bites?
Keep them in an airtight container at room temperature; they stay fresh for up to five days.
- → Are there any allergens to be aware of in these pretzel bites?
They contain wheat (gluten) and soy from the candy melts; milk may also be present depending on the candy melts brand used.