 Pin
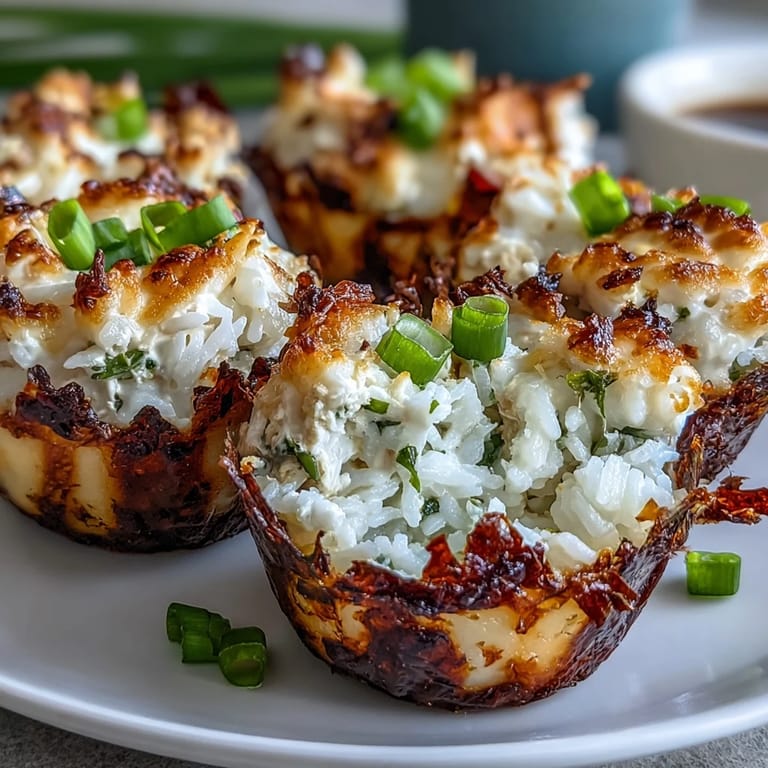
Pin The first time the scent of toasted nori wafted from my oven, I couldn't help but grin at how simple ingredients turned into playfully irresistible sushi bake cups. There was a lively crackle as the panko browned, and for a brief moment, my kitchen felt like a pop-up izakaya. I had been searching for something novel for a movie night snack and, honestly, these bite-sized cups outshone the popcorn. Sometimes, the fun is in the experiment, not just the outcome. Now, every batch fills the house with anticipation and laughter, especially when friends try (and fail) to eat them gracefully in one bite.
I remember prepping these for a backyard get-together, the playlist bouncing and kids circling the kitchen, noses wrinkling with curiosity about 'sushi cupcakes.' That evening, tuning in to the laughter as someone debated whether a cup was finger food or needed chopsticks, I realized these had outwitted the formality of sushi altogether. The best moment was someone sneaking an extra straight out of the pan—no plate needed—because they were simply too good to wait.
Ingredients
- Cooked sushi rice: Warm, sticky rice is the foundation here—I've learned that using slightly warm rice helps it absorb the sweet-salty vinegar mixture better.
- Rice vinegar: This gives the rice its trademark tang; I like to add it while the rice is steaming to prevent clumping.
- Sugar: Just a touch balances the vinegar—fine grains dissolve quickly.
- Salt: Essential to bring out the subtle flavors in the rice layer.
- Canned tuna (in water): Drained thoroughly, tuna keeps these cups moist but not soggy; any excess water will make the rice mushy.
- Japanese mayonnaise: Kewpie makes the filling extra creamy and rich—I’ll sneak in a taste before assembling!
- Sriracha: Adds as much or as little kick as you like; I sometimes split the batch for spice lovers and skeptics.
- Soy sauce: Just a drizzle boosts the umami in the filling—go easy to avoid overpowering the fish.
- Green onions: Finely chopped for a fresh, zesty bite throughout.
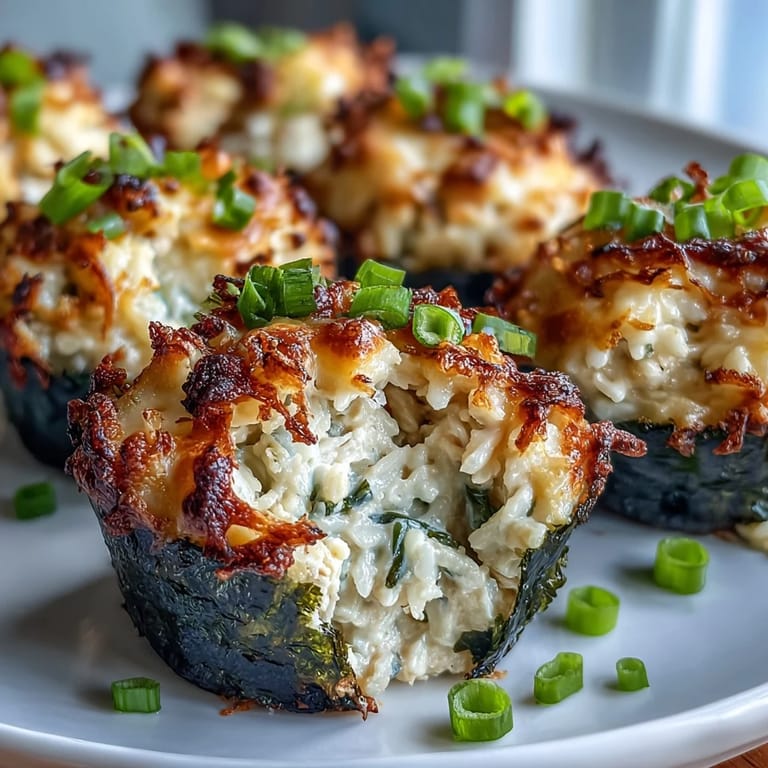
- Roasted nori sheets: Halved to fit the muffin tin, and crisp up just enough in the oven without burning.
- Shredded mozzarella: This melts into golden bubbles on top, adding a gentle gooeyness—don’t overload, or it will spill over.
- Japanese-style panko breadcrumbs: Scatter on a thin layer for unbeatable crunch, but keep an eye on them in the last minutes of baking.
- Sesame seeds: Sprinkled on at the end, their nutty aroma signals the cups are ready to devour.
- Avocado, extra sriracha, sliced green onions (optional): These garnishes brighten and personalize each bite—a trick I learned to keep things exciting for guests.
Tired of Takeout? 🥡
Get 10 meals you can make faster than delivery arrives. Seriously.
One email. No spam. Unsubscribe anytime.
Instructions
- Heat up and prep:
- Get your oven cozy at 375°F (190°C) and lightly grease a standard 12-cup muffin pan. I always do a quick check that the nori halves nestle neatly into each well.
- Season the rice:
- Splash your warm rice with vinegar, sugar, and salt, mixing with a cutting motion so it stays fluffy and sticky but not smashed.
- Line with nori:
- Press each nori half into the muffin cups, letting the corners crinkle up the sides—perfection not required, rustic is charming here.
- Fill with rice:
- Divide the seasoned rice among the cups, pressing in gently so there are no empty pockets—firm but not too hard, or the cups will be dense.
- Mix the tuna:
- Stir the drained tuna with mayo, sriracha, soy sauce, and green onions until creamy and slightly pink; sneak a taste and adjust spiciness to your mood.
- Spoon over rice:
- Add a generous dollop of the tuna mix to each cup, smoothing out the tops so the cheese layer comes out bubbly and even.
- Top and bake:
- Scatter a light shower of mozzarella and panko atop each cup, then slide them in the oven until the edges are golden and everything smells irresistible—about 15–20 minutes.
- Cool and finish:
- Once they’re bubbling, cool in the tins for five minutes so they firm up; gently lift each one out with a spoon.
- Garnish and serve:
- Dust with sesame seeds and top with avocado, extra green onions, or a quick zigzag of spicy mayo if you’re feeling extra festive. Eat them warm for gooey melts, or let them cool for portable party snacks.
 Pin
Pin One rainy Sunday, I made a double batch for my neighbors, and seeing their kids giggle as they bit into the crunchy, creamy layers was pure joy. The simple act of sharing these transformed an ordinary afternoon into a memory we all still laugh about.
Choosing Your Fish (or Not!)
Swapping in salmon, crab, or even chickpeas keeps things interesting; I've even mixed half tuna, half salmon for a 'best of both worlds' cup. If you go vegetarian, mashing chickpeas with a splash of lemon juice gives a surprisingly satisfying texture, and everyone can join in the fun.
Make-Ahead and Reheat Tactics
I've learned you can assemble the cups ahead, cover, and chill up to a day before baking—great for parties or weeknight saviors. Just remember, a quick extra sprinkle of panko before they hit the oven revives the crunch after sitting in the fridge.
Presentation and Serving Surprises
Don't stress about perfect shapes; their rustic look only adds to the charm, and a quick garnish makes them party-ready in seconds. Plating them on a big wooden board with dipping bowls steals the show every time.
- A dab of wasabi tucked under the tuna keeps sushi purists happy.
- Try tiny pickled ginger slices for a pop of color and zing.
- These hold up for picnics—just skip the avocado until the last second for peak freshness.
 Pin
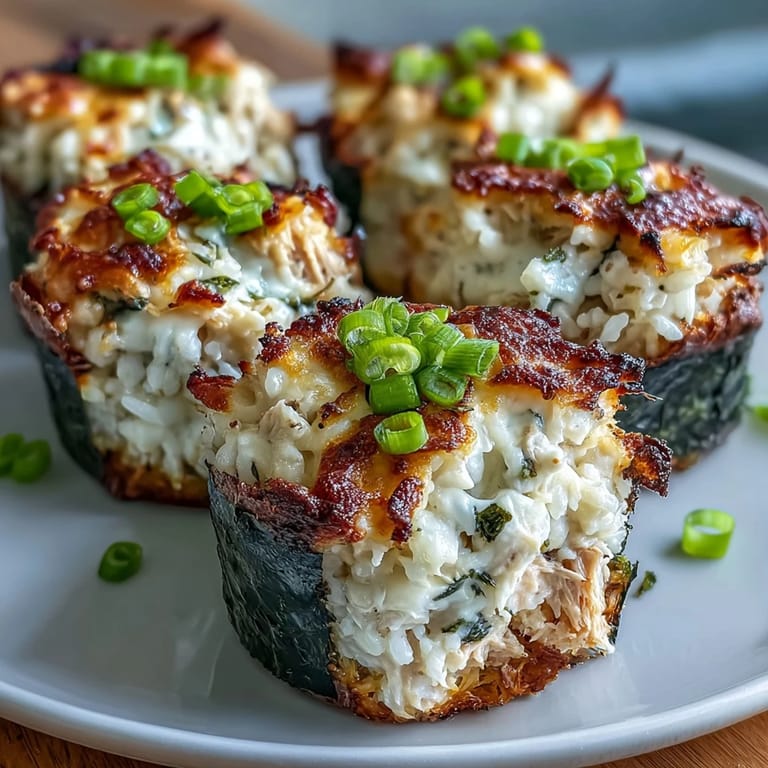
Pin Whether for parties or lazy nights, these sushi bake cups guarantee happy hands and empty trays. I hope your batch brings the same playful spirit to your table.
Recipe Q&A
- → What type of rice is best for these tuna cups?
Short-grain sushi rice works best as it sticks together well when seasoned, helping the cups hold their shape.
- → Can I adjust the spice level in the tuna filling?
Yes, you can add more or less sriracha to suit your preferred heat level or omit it entirely for a milder flavor.
- → How should I store leftover tuna sushi bake cups?
Store leftover cups in an airtight container in the refrigerator and consume within 2 days for best taste and safety.
- → Are there alternatives to canned tuna for this dish?
Yes, you can substitute crab, salmon, shredded chicken, or mashed chickpeas for a vegetarian option.
- → What is the best way to reheat the bake cups?
Reheat gently in an oven or toaster oven at low temperature to maintain crispiness and texture without overcooking.