 Pin
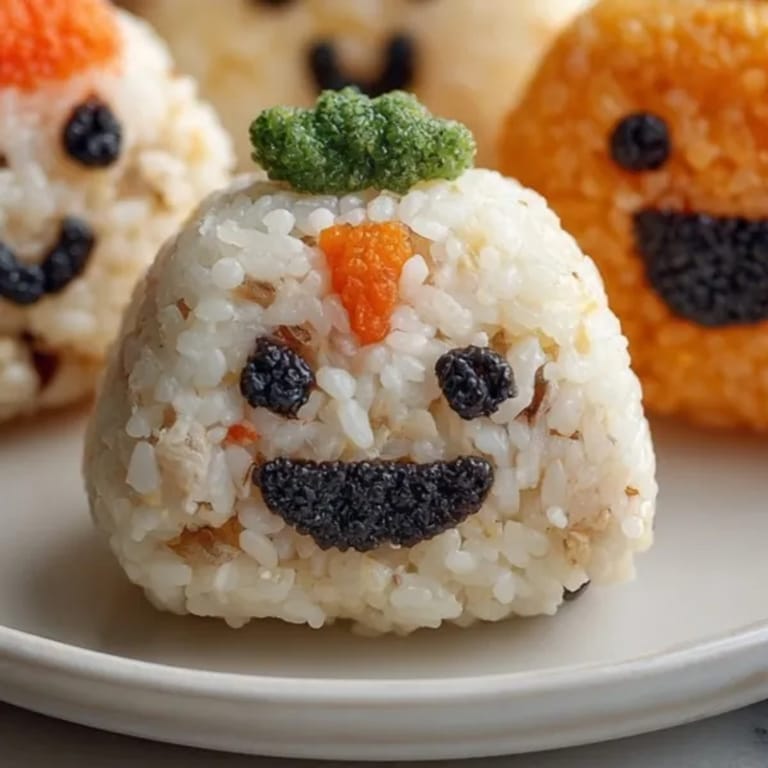
Pin These Halloween Stuffed Rice Balls bring a playful twist to classic Japanese onigiri. They are soft, flavorful, and simple to personalize for any gathering. From spooky faces to savory fillings, these rice balls are a party highlight and kid favorite. The decorating process always reminds me of Halloween with my nieces when we spent the afternoon getting creative and laughing at our silly rice monsters.
The first time I made these I had leftover rice and veggies and wanted something festive for my son's school treat. He now requests them every October to share with friends.
Ingredients
- Japanese short-grain rice: guarantees authentic stickiness for easy shaping
- Water: allows rice to cook tender and maintain its structure
- Salt: seasons the rice and boosts flavor without overpowering
- Tuna with mayonnaise: creates a creamy classic filling with rich taste
- Cooked chicken: brings protein and savory notes for those who prefer meat
- Mixed vegetables: like sautéed mushrooms or corn add color and freshness
- Pickled plum: provides a tangy punch for an adventurous touch
- Nori: supplies crisp texture and makes decorating easy
- Cheddar or mozzarella cheese: gives a splash of color and playful accents
- Carrot slices: deliver crunch and vibrant detailing
- Black sesame seeds: offer extra depth in flavor and fun visual effects
Tired of Takeout? 🥡
Get 10 meals you can make faster than delivery arrives. Seriously.
One email. No spam. Unsubscribe anytime.
Instructions
- Rinse the Rice:
- Wash rice several times under cool water swirling until water turns clear. This removes excess starch for perfect texture. Add rice and measured water to your rice cooker or pot.
- Cook the Rice:
- If using a rice cooker follow directions. For stovetop bring rice and water to a boil cover reduce heat and simmer for exactly 18 minutes. Remove from heat and let rest covered for 10 minutes.
- Prepare Fillings:
- While rice rests cook and season your fillings. Mix tuna with mayonnaise until creamy or shred chicken and sauté vegetables for bold taste.
- Cool and Fluff Rice:
- Spread hot rice onto a flat surface or in a bowl. Fluff gently with a paddle or fork letting steam escape until rice is just warm but easy to handle without burning fingers.
- Shape Rice Balls:
- Wet your hands and rub palms with a little salt for flavor and nonstick help. Scoop around a third cup of rice press flat in your palm then add your chosen filling in the center.
- Seal and Mold:
- Gently press rice around filling to seal fully. Shape into a round ball or triangle using both hands for even form. Repeat with remaining rice and filling options.
- Decorate Faces:
- Cut nori sheets into fun small pieces like eyes mouths and scars using sharp scissors or craft punch. Stack cheese and carrot slices for teeth and eyes or extra features. Adhere decorations with a dab of water pressing lightly onto rice balls.
- Add Final Touches:
- Sprinkle with black sesame seeds if desired for more detail and crunch. Arrange rice balls on a platter showing off their spooky faces.
 Pin
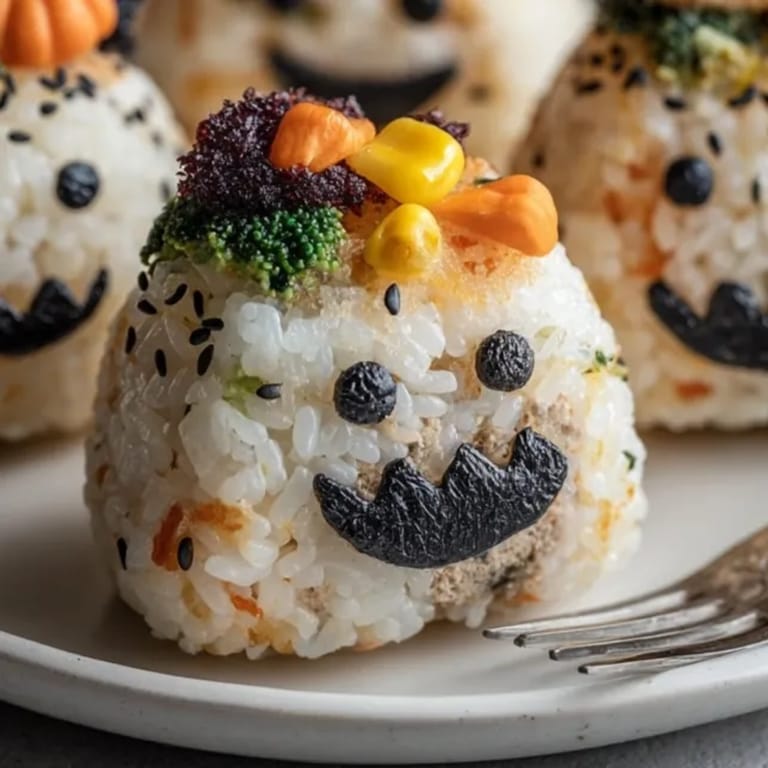
Pin My favorite ingredient is the pickled plum for its tang and burst of flavor. Last Halloween my daughter insisted on making every rice ball a unique silly face which transformed our kitchen into an art studio. These small moments remind me why home-cooking connects families.
Storage Tips
Keep leftovers refrigerated in a lined airtight container for up to two days. To prevent drying cover with damp paper towel or plastic wrap. Rice balls can be frozen tightly wrapped and thawed overnight in the fridge. Microwave in short bursts to restore softness but skip reheating if decorated with cheese for best texture.
Ingredient Substitutions
Swap tuna for flaked salmon or mashed chickpeas for a vegetarian spin. Vegan mayo and non-dairy cheese work well and any firm vegetable such as edamame or roasted pumpkin makes colorful fillings. If nori is unavailable use washed spinach leaves or thinly sliced cucumbers.
Serving Suggestions
Arrange on a platter with a dipping bowl of soy sauce and wasabi for guests who enjoy heat. Add sliced fruit or steamed edamame to turn this into a balanced bento box lunch. These rice balls are excellent with green tea for a midday break.
Cultural and Historical Context
Rice balls called onigiri are a Japanese staple found in lunchboxes and picnics. Decorating with faces is a newer playful touch inspired by character bentos or kyaraben. These treats mix tradition with seasonal fun perfect for Halloween parties and family gatherings.
Seasonal Adaptations
Use roasted pumpkin instead of standard vegetables in autumn Try colored nori or food-safe food coloring for festive Halloween characters Shape rice balls into pumpkins or ghosts for a creative twist
 Pin
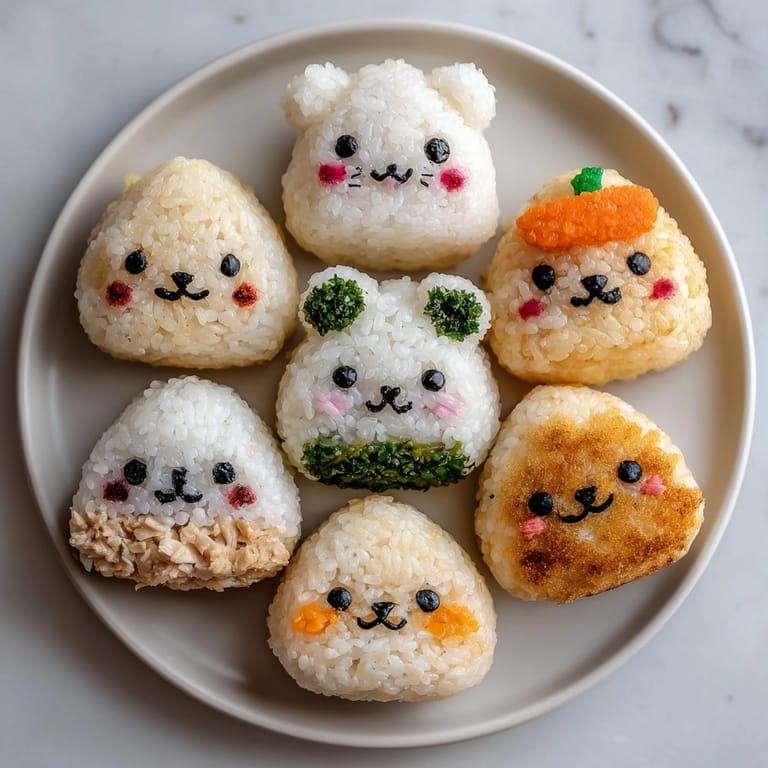
Pin Serve with a smile and enjoy each creative bite. These Halloween rice balls are sure to become a fun annual tradition.
Recipe Q&A
- → What type of rice is best for these stuffed rice balls?
Japanese short-grain rice yields the preferred sticky texture, making shaping and molding easier for decorative rice balls.
- → Can these rice balls be made vegetarian or vegan?
Absolutely! Use sautéed vegetables and vegan mayonnaise, and skip animal-based fillings for a plant-based option.
- → Which fillings can be used for more flavor?
Mix up cooked tuna with mayo, seasoned chicken, or sautéed veggies like mushrooms and spinach for a variety of tastes.
- → How do I create the Halloween faces?
Cut sheets of nori for facial features, add cheese or carrot for extra color, and use black sesame seeds for small details.
- → How long do these rice balls stay fresh?
They're best served fresh, but can be kept in an airtight container for up to a day. Chill if using perishable fillings.
- → Are there allergy considerations to keep in mind?
Check whether fillings contain fish, eggs, or dairy, and review labels for nori and sesame seeds processed in shared facilities.