 Pin
Pin I'll never forget the first time I attempted to transform a simple cheese board into something that made guests actually gasp when they walked into the room. It was a holiday dinner at my aunt's house, and I was tasked with bringing "just an appetizer." Standing in her kitchen, staring at blocks of chilled Gouda, I had this sudden vision of a forest of cheese trees marching around the edges of a platter like little sentries guarding a treasure of flavors. That moment of inspiration turned a straightforward cheese board into the showstopper that had everyone asking for the recipe before they'd even tasted it.
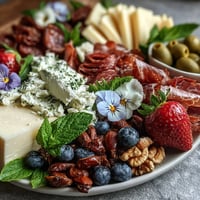
I remember my sister-in-law watching me slice those first cheese triangles, skeptical that this would actually work. Then as I started arranging them around the board with the grapes nestled between like little ornaments, I saw her expression shift. By the time we filled the center with a selection of aged cheddars, creamy bries, and aged goudas, she was already mentally planning her own version for her office party. That's when I realized this wasn't just food—it was a conversation starter that made people feel celebrated.
Ingredients
- 250 g semi-firm cheese (Gouda, Edam, or Emmental), well chilled: The chill is everything here. Cold cheese slices cleanly without crumbling, which is why I always chill mine for at least an hour beforehand. Gouda gives you a slightly sweet nuttiness that feels festive, while Emmental brings a more delicate flavor. The semi-firm texture is your friend—hard enough to hold its triangle shape, but not so brittle it shatters when you cut it.
- 150 g small green seedless grapes, washed and thoroughly dried: The drying step isn't just fussy—any moisture will make them slip around on the board and look sloppy. I pat mine with paper towels twice and let them air dry for a few minutes. Green grapes against the golden cheese create that magical contrast that makes this whole arrangement pop visually.
Tired of Takeout? 🥡
Get 10 meals you can make faster than delivery arrives. Seriously.
One email. No spam. Unsubscribe anytime.
Instructions
- Chill your cheese properly:
- Take your cheese block out and let it sit in the coldest part of your fridge for at least an hour, preferably two. This matters more than you'd think. Cold cheese slices with authority instead of squishing, and those clean edges are what make your triangles look intentional rather than haphazard.
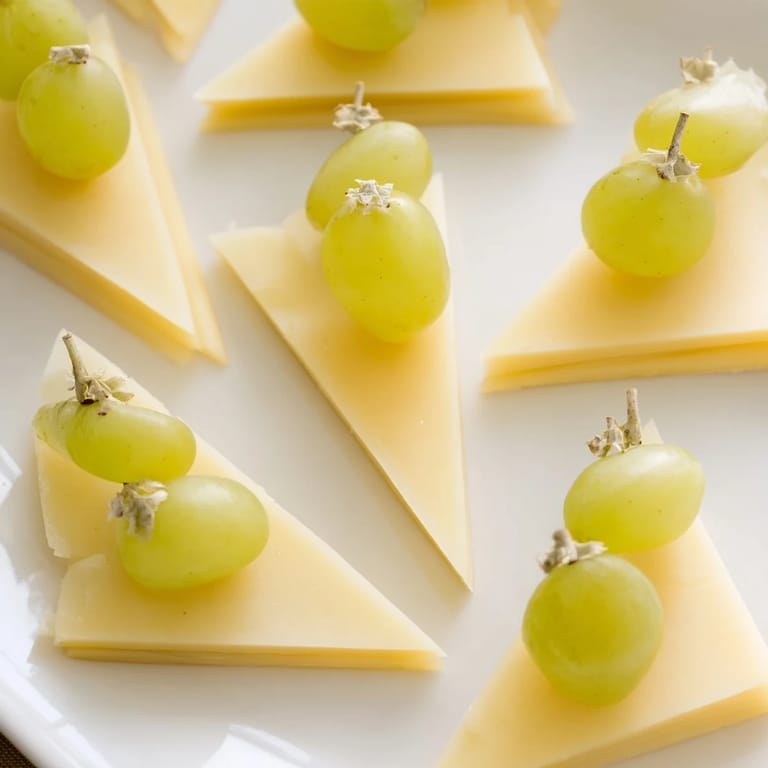
- Slice triangular tree shapes:
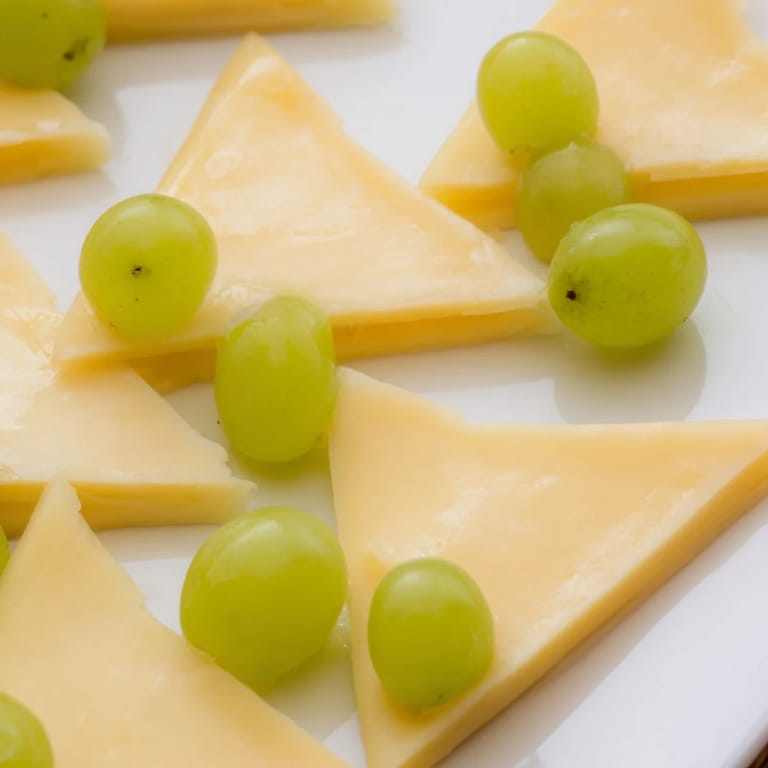
- Using a sharp chef's knife, cut your cheese into thin triangles about 5-6 cm long with a 1 cm base. Think of them as stylized evergreens—pointed at the top, stable at the bottom. The consistency of size matters for the visual rhythm, so take a breath and make each slice count. Don't worry about perfection; slight variations actually add charm.
- Arrange the border foundation:
- Start at one corner of your board and begin laying triangles with points facing outward, like you're creating a fence of tiny trees. Work your way around all four edges. This is the moment it starts looking intentional. Stand back and admire—you're building something here.
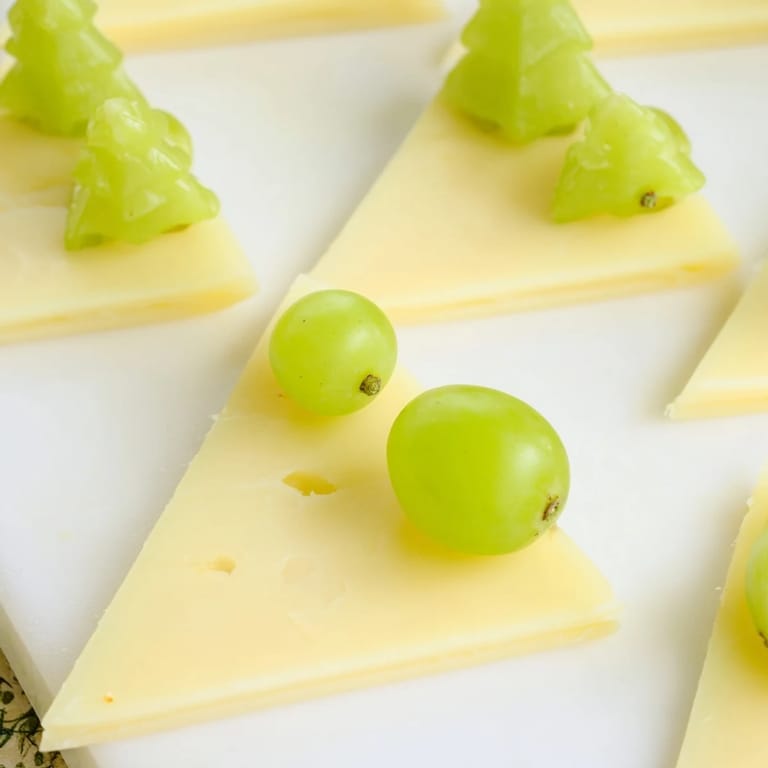
- Nestle the grapes:
- This is where the magic happens. Take your dried grapes and gently tuck them into the spaces between cheese triangles. Fill the gaps, create little clusters, let them nestle between the points. They'll catch the light and look like tiny jeweled ornaments hanging on your cheese forest.
- Fill the center:
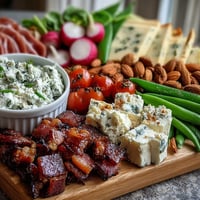
- Now for the heart of the board. Arrange your other cheeses, cured meats, crackers, and accompaniments in the open center space. Let the cheese tree border frame your choices, creating a beautiful boundary that makes everything inside feel more curated and intentional.
 Pin
Pin There was this moment during the holidays when my nephew, who's usually glued to screens, actually paused his video game to stare at the board I'd made. He pointed at the cheese trees and asked if we could make something like that together next year. That's when I understood that food presentations like this aren't really about impressing adults—they're about creating memories for the people who matter most, giving them something beautiful to look at and talk about as they're building connections over shared bites.
The Art of the Cheese Board Border
What I've discovered over several holiday seasons is that cheese boards are about rhythm and balance. The Tannenbaum border works because it creates a visual frame that makes everything feel more intentional and curated. When people see this border, something shifts in their minds—suddenly it's not just snacks, it's a thoughtfully created experience. The triangle-and-grape pattern has this satisfying repetition that feels almost meditative to create, and guests always want to know what you did differently.
Choosing Your Cheese Wisely
The beauty of this presentation is that you're not locked into one cheese choice. I've experimented with smoked Gouda for a deeper flavor, sharp Emmental for something more complex, and even pale Edam for a subtler sweetness. The thing I've learned is that semi-firm cheeses really are essential—they have enough structure to hold their shape but aren't so hard they become difficult to work with. Soft cheeses will crumble, hard cheeses become frustratingly brittle. It's that sweet spot in the middle that makes this work. Your cheese choice sets the flavor tone for the entire board, so choose something you actually love eating.
Variations and Personal Touches
Once you've mastered the basic green grape and golden cheese combination, you'll start seeing possibilities everywhere. Fresh rosemary sprigs woven between the triangles add an authentic pine needle effect and fill the kitchen with that incredible holiday scent. A few pomegranate seeds or red grapes scattered throughout add color depth without disrupting the design. I've even tried thin slices of white cheese alongside the golden varieties to create a two-tone border that feels more sophisticated. The recipe is just a foundation—your instincts and preferences are what will make it uniquely yours.
- Add fresh rosemary sprigs between the cheese triangles for authentic evergreen texture and aroma
- Mix in pomegranate seeds or red grapes strategically for color contrast without overwhelming the design
- Consider a second cheese variety in white or pale tones to create visual depth and flavor complexity
 Pin
Pin This board isn't just an appetizer—it's a moment you're creating for the people you're gathering. Every triangle you arrange and every grape you nestle is a small act of care that says you wanted to make something beautiful for them. That's the real recipe.
Recipe Q&A
- → What type of cheese is best for the Tannenbaum border?
Semi-firm cheeses like Gouda, Edam, or Emmental are ideal since they can be sliced thinly into triangular shapes that hold well.
- → How do I create the pine tree shapes with cheese?
Slice the chilled cheese into thin triangles approximately 5–6 cm long and 1 cm wide at the base to mimic stylized pine trees.
- → Can I use other fruits besides green grapes?
Yes, small red grapes or pomegranate seeds add festive colors and can be alternated with the green grapes for visual interest.
- → How long does it take to assemble the border?
Preparation takes about 15 minutes with no cooking required, making it a quick decorative addition to your board.
- → What are some serving suggestions for the center of the board?
Fill the center with a variety of cheeses, charcuterie, crackers, or breads to complement the decorative border.