 Pin
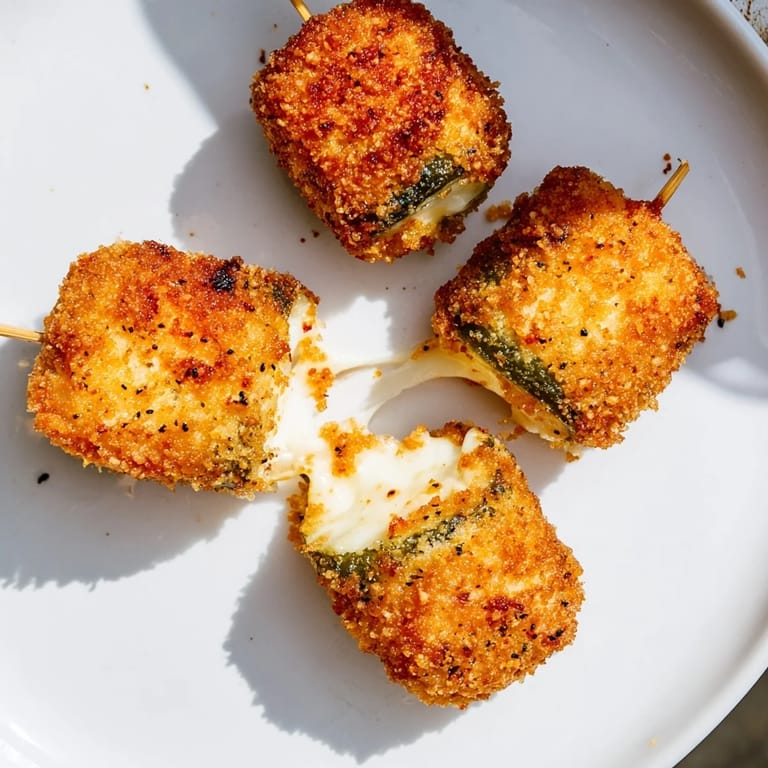
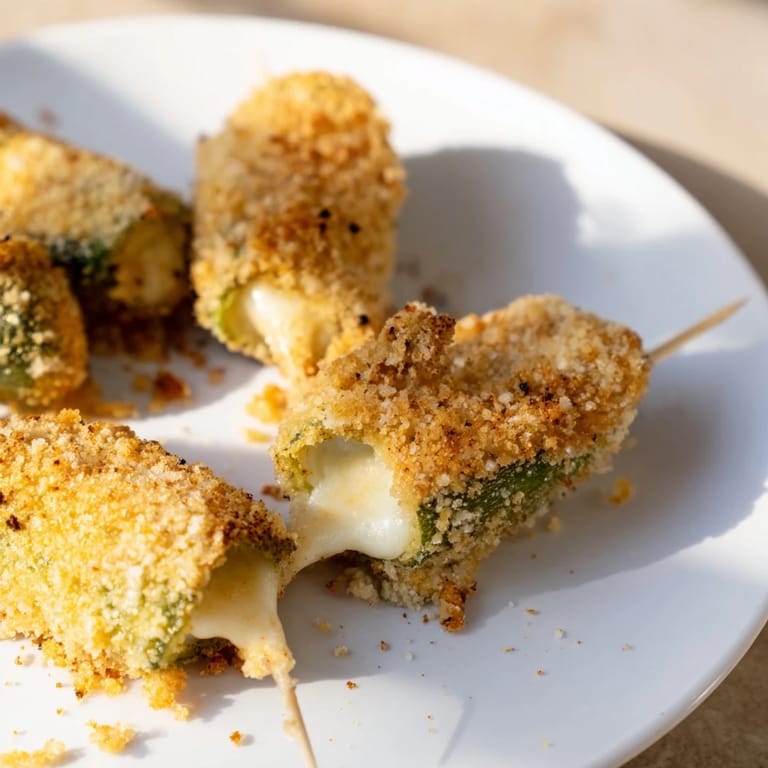
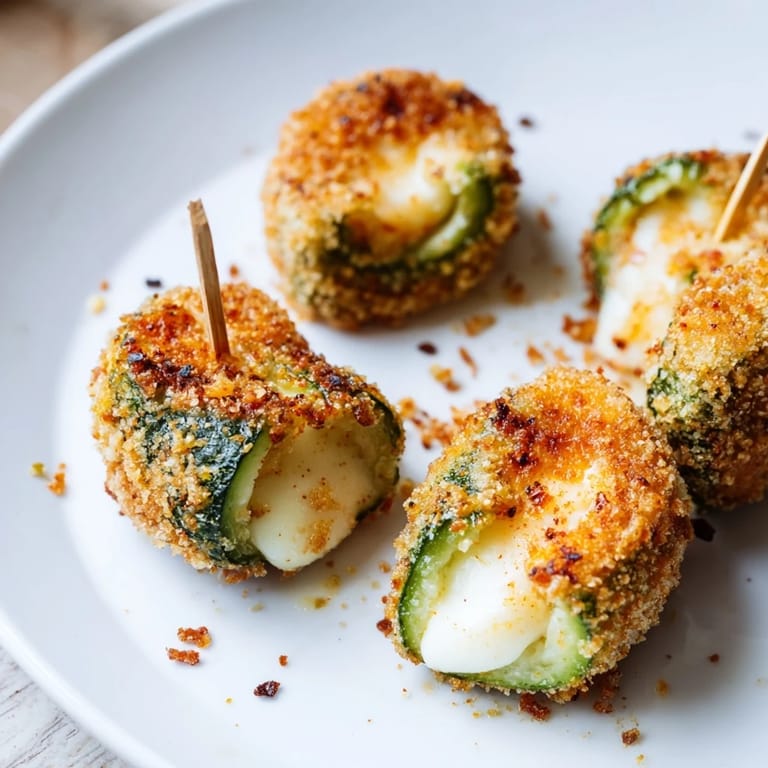
Pin My friend texted me a photo from a sports bar showing these golden, crispy little parcels of chaos—pickle wrapped in cheese, deep fried. I laughed and asked what they were. "Chicken fried pickles but make it cheesy," she said. I had to try it, and the moment that first one hit the oil and started crackling, I knew I was onto something that would ruin my ability to enjoy regular appetizers. Now I make them constantly, and they've become my secret weapon for keeping people happy at the table.
I made these for a game night last fall, and my brother—who usually just eats the snacks without commenting—sat there and ate seven in a row without saying a word. When he finally looked up, he just said, "Why have I never had this before?" I realized then that sometimes the best food moments aren't about technique or fancy ingredients; they're about stumbling onto that perfect combination of textures and flavors that just works.
Ingredients
- Dill pickle spears: The foundation of everything, and patting them absolutely dry is non-negotiable because moisture is the enemy of crispiness.
- Mozzarella cheese (or cheddar, provolone, pepper jack): The cheese needs to melt quickly and hold together, so skip the fancy artisanal varieties and stick with something that actually melts.
- Large egg: This binds the breadcrumbs to the cheese and pickle; one egg is enough for a full batch.
- Milk: Thinning the egg just slightly makes it easier to coat everything evenly without clumps.
- Gluten-free panko breadcrumbs: Regular panko works too, but the gluten-free version stays crispier longer and doesn't absorb oil as quickly.
- Garlic powder, smoked paprika, black pepper: These transform simple breadcrumbs into something that tastes intentional and flavorful.
- Vegetable oil: You need enough to create a proper frying environment; 350°F is your target, and a thermometer is worth its weight in gold here.
Tired of Takeout? 🥡
Get 10 meals you can make faster than delivery arrives. Seriously.
One email. No spam. Unsubscribe anytime.
Instructions
- Dry your pickles like your life depends on it:
- Pat each spear with paper towels until they feel genuinely dry to the touch. Any moisture will cause sputtering and uneven frying. Cut each spear in half to create sixteen pieces that are easier to handle and fry evenly.
- Wrap the cheese around the pickle:
- Lay a cheese slice flat, position a pickle piece at one end, and roll it tightly. If it feels loose, secure it with a toothpick—it'll keep everything together during the chaos of frying.
- Create your coating stations:
- Whisk the egg and milk in one shallow bowl until well combined. In another bowl, mix the breadcrumbs with garlic powder, smoked paprika, and black pepper so the seasoning is distributed evenly.
- Bread each bite with purpose:
- Dip each cheese-wrapped pickle into the egg mixture, making sure it's fully coated, then immediately roll it in the breadcrumb mixture. Press gently so the crumbs stick rather than just settle on top.
- Heat your oil to exactly right:
- Use a thermometer and aim for 350°F. If it's too cool, they'll absorb oil and feel greasy; too hot, and the outside burns before the cheese melts.
- Fry in batches and watch for the golden moment:
- Don't crowd the skillet. Fry for about two to three minutes per batch, turning occasionally with tongs so all sides get evenly crispy and golden. You're looking for that moment when the coating turns a deep golden color.
- Drain and serve while they're still steaming:
- Place them on a paper towel-lined plate to absorb excess oil, remove any toothpicks, and serve them hot. They're best eaten within minutes of frying.
 Pin
Pin There's something almost absurd about how happy these little things make people, and that's when food actually wins—not when it's complicated or Instagram-worthy, but when it creates that moment where everyone stops talking and just enjoys something together.
The Cheese-to-Pickle Ratio That Works
I used to think one slice of cheese per pickle was the standard, but I've found that depending on your cheese thickness, one slice wrapped around the pickle piece gives you just enough melted cheese without it leaking everywhere. If you're using thinner slices, stack them or fold one slice in half before wrapping. The goal is a layer that's thick enough to taste present but thin enough that it melts completely in the time it takes the breadcrumbs to crisp up.
Temperature Control Is Everything
This is genuinely the difference between a disappointment and something people remember. At 350°F, the outside crisps up while the cheese inside melts at the same pace. I've seen people try frying at 375°F to save time, and all they get is burnt coatings with cold cheese, which defeats the entire purpose. A reliable kitchen thermometer costs about ten dollars and will save you from countless small kitchen disasters.
Dipping Sauces and Serving Ideas
Ranch is the obvious choice, and honestly, it's perfect with these because the cool, creamy element balances the heat of the fried cheese and the tang of the pickle. But I've had success with spicy mayo, marinara, or even a quick sriracha-honey mix if you want to go adventurous. The beauty of these bites is that they're neutral enough to pair with almost any dipping sauce, yet strong enough in flavor that they stand on their own.
- Make a quick spicy mayo by mixing mayo with sriracha and a squeeze of lime juice.
- If you're baking instead of frying, spray them lightly with oil and bake at 425°F for twelve to fifteen minutes, flipping halfway through.
- These freeze beautifully before frying, so you can assemble a batch ahead and fry them whenever you need a crowd-pleaser.
 Pin
Pin These bites have become my go-to move when I need to impress someone without actually trying hard. They're the kind of thing that tastes accidentally sophisticated but is laughably simple to make.
Recipe Q&A
- → What cheese works best for wrapping pickles?
Firm and meltable cheeses like mozzarella, cheddar, provolone, or pepper jack hold shape well and offer creamy texture when fried.
- → How can I ensure the coating stays on during frying?
Pat pickles dry before wrapping, use an egg and milk wash to help breadcrumbs adhere, and press coating gently to ensure it sticks firmly.
- → Can I bake these instead of frying?
Yes, place bites on a parchment-lined sheet, spray with oil, and bake at 425°F for 12–15 minutes, flipping halfway for even crispiness.
- → What dipping sauces complement these bites?
Ranch, spicy mayo, or marinara sauces enhance the tangy and savory flavors beautifully.
- → Are these bites gluten-free?
Using gluten-free panko breadcrumbs makes this snack suitable for gluten-free diets. Otherwise, regular breadcrumbs contain gluten.